Varen er på fjernlager, leveringstiden er 4-7 hverdager. Mere info
Frakt 25,00 - Bring - Hentes på Posten.
NOK
474,00
eksklusiv MVA 379,20
Totalt inkl. frakt
499,00
Denne funksjonen krever at man er logget inn. Opprett en bruker og liste systemet for å holde styr på fremtidige kjøp eller ønskelister. Opprett bruker Login
Send på mail
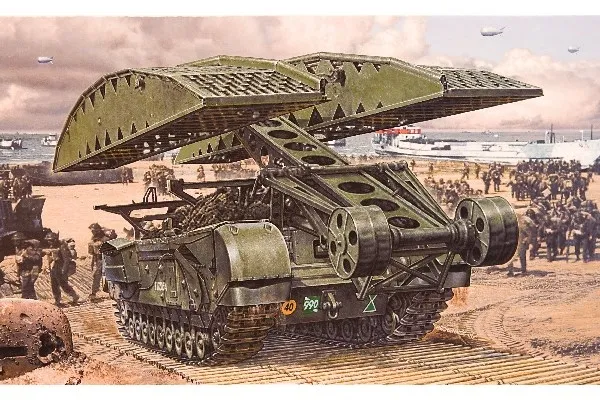
1:76 Churchill Bridge Layer
Taking just 1.5 minutes to deploy, the Tank Bridge No.2 provided a Class 60 tracked load and a Class 40 wheeled load over a 30ft gap. The bridge was in one piece and mounted on the turretless tank.
The launching arm was attached by a pivoting arm mechanism with rollers to the front of the tank, the other end of the arm being attached to the centre of the bridge. The bridge remained horizontal as it was raised and then lowered by the pivot arm across the gap.
Produktet har følgende varenummer i vårt system:
EAN:
5055286661174
SKU:
5055286661174
Hvorfor oplever jeg at den umiddelbart samme varer findes på forskellige varenumre?
Producenterne udgiver ofte den samme varer med forskellige varenumre, typisk handler det udelukkende om forskellige versioner af emballagen. Eksempelvis kan emballagen være målrettet forskellige lande.
Vi forsøger bedst muligt at samle varerne, men det kan opleves at den samme varer figurerer på forskellige varenumre i vores system.